
Pistol Grip Technique: The Second Habit of Effective Shooters
Hey, what’s up, everybody! In this post, I’m going to be talking about the pistol grip technique and how mastering it can significantly improve your firearm control, accuracy, and overall shooting proficiency. Let’s go ahead and get started.
Grip
Your grip is your connection to your weapon system. Without a good grip, your weapon will go to the path of least resistance and your shots will fly aimlessly off their mark. Most novice shooters will grip their guns by copying what they’ve seen in pictures or movies, but there’s a better way! Don’t follow Hollywood. Think outside the box — hell, ACT outside the box and you’ll tighten up those ugly shot groups in no time!
Pistol
The most important part about gripping your gun correctly is selecting a gun that fits your hand. Guns are built to a variety of specifications and so are your hands. It’s a good idea to start off with something that fits your hand rather than try to adjust your grip to fit a gun. Head out to your favorite Gun Mart before you purchase a gun to see how it feels in your hand.

Some guns these days have different grips or back straps you can change out for a better fit, so check to see if these are available. The gun should fit comfortably in your hand with the forearm of your firing hand in a direct line behind the pistol, and your trigger finger should be able to reach the trigger without dragging along the side of the gun. We’ve all heard the saying, “If the glove doesn’t fit, you must acquit.” When it comes to guns, “If the gun doesn’t fit, you’re not going to hit.”
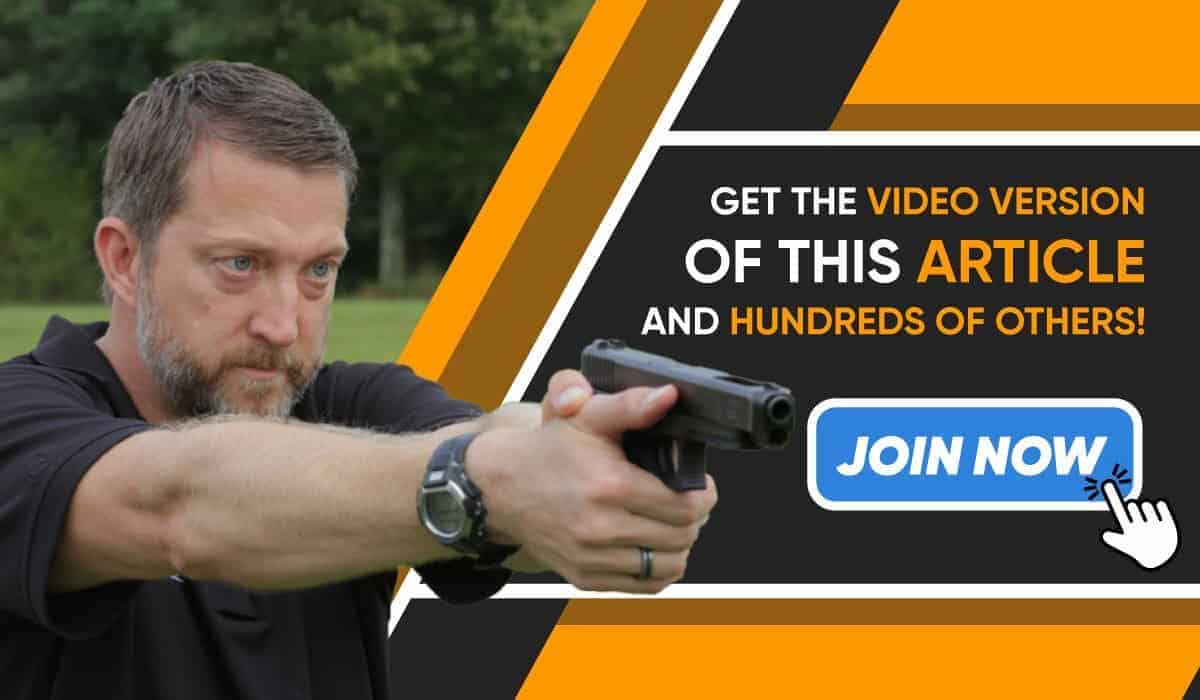
Now that you’ve selected the right piece of equipment, let’s talk about how to control that explosion going off in your hands. When you grip the gun, make sure that the forearm of your strong hand is in line with a pistol. Just like I talked about in the First Habit of Highly Effective Shooters, it’s important to have as much of your body behind the gun as possible to control recoil, and it starts here with a pistol.
Your hand needs to be as high up the gun as possible. In a perfect world, you would have your hand directly behind the barrel, but guns have moving parts up there making this impossible. Keeping this in mind, your hand should be high enough on the grip so the webbing of your hand is compressed on the beaver tail. Wrap your hand around the gun and make sure your trigger finger is not riding along the side of the grip as this can pull the gun off target as you press back on the trigger.
Don’t get caught up in placing your trigger finger in a certain spot on the trigger. Everyone’s hands are built differently, and what works well for a paper shooter on a one-way range may not work for you when you hear the snap of rounds whizzing past your pineapple. Just make sure you’re able to press the trigger straight back while keeping your sights on target.

If you’re using a two-handed technique (and I suggest you do whenever possible), the support or reaction hand should be placed with the palm of the hand filling the space on the grip left by the strong hand. To do this your support hand should be angled down at about a 45-degree angle.
Some people teach a 60/40 grip for how hard you should be gripping the gun. I teach a 100/100 grip since that’s what you’re going to do in combat and it’s best to think about how you’re going to drop the threat rather than how hard you’re squeezing the gun. Both your thumbs should be pointing forward. I’ve found that the more things you have pointed at your target, the better chance you have at hitting it.
Good Grip: The Second Habit of Highly Effective Shooter
Carbine
Next, in this pistol grip technique, the grip for the firing hand of a carbine is the same as a pistol. The gun is controlled with the support hand, leaving the strong hand to concentrate on fire control. Before I talk about the forward grip of the carbine, I need to talk about accessories such as lights or lasers. Before you start tricking out your bang-stick with cool-guy gear, make sure you can shoot it accurately. Take it out to the range establish a solid shooting position and note where your forward hand grips the gun.
Now look at the open space you have available…this is where you need to mount accessories. I see a lot of guys on the range saying they can’t grip the gun properly because something is in the way. Don’t let the tail wag the dog! You need to be able to shoot effectively first or that cool new light is not going to do you any good.

Now that we’ve cleared the playing field, grip your gun as far out on the gun as possible. I ask my students; if you were going to nail a 2×4 to a wall and only had two nails, where would you put the nails to give you the most support? The answer is always the same, as far apart as possible. If you want to support your gun, you need to do the same thing.
There are a number of different ways to grip the gun, but it’s important that some part of your hand is above the level of the barrel. The recoil of the gun is going to kick the gun up. If you’re trying to hold the gun from underneath, it’s going to bounce out of your hand every time.
For the same reason, it’s important that you take that hinge point (elbow) out of the equation. Most people I see on the range shoot with the support elbow directly beneath the gun giving the weapon a perfect hinge to move around. By simply rotating the arm out to the side, you eliminate the hinge and are better able to drive the gun. As with the pistol, I like to point out anything I can at the target. In this case, depending on your grip, you can either point your thumb or your index finger.
Get a Grip!
If you didn’t want to read all the fine print above, make sure you write this stuff down in your range book:
- Select a gun that fits your hand.
- Establish your grip from the holster.
- Get your forearm in a direct line behind the gun.
- Get your hand as high as possible on the gun.
- Squeeze the gun with both hands…hard.
- Put your finger where it fits and press straight back.
- Point everything you can at your target.
- Remove hinge points.
- Dry fire!
Alright, so that is it for today. I hope you got some value out of this pistol grip technique, and remember to practice consistently. Please share and comment on this post if you haven’t already, and keep paving your path to perfection!
This was a great article! Thank you for posting it!
Awesome. Every article about good shooting helps a lot since I don’t really get much coaching on my own. I appreciate the great stuff!
Oh, and I see you’re rocking the watch tan, heck yeah!!
I’m glad the articles are helping, but as you know an article is no substitute for professional instruction. There are a lot of good shooting instructors out there, and some bad ones, so do some research before you make the investment.
Glad you like the tan-line. From a lot of time spent on the range!
Thanks for a great article. I particularly like the point of pointing as many parts of your body towards the target!
I appreciate the comment. I’d like to hear if it’s helping. Best, Chris
How hard should i grip my pistol? I was told once that I should grip a gun hard enough to hold a bird but not hard enough that i would kill it. is that accurate? It seems like I lose the grip from my pistol everytime I shoot it. Any suggestions will be helpful.
I tell guys to use the same grip strength as if you were holding a hammer. No white knuckles, but it’s not going to fly out of your hand either. You can even get a good feel for it by holding two full size hammers up in your mounted shooting position. If you don’t have two hammers at home, go have some fun at the hardware store! I haven’t held too many live birds, so I can’t relate to that one. Try the hammer trick and let me know what you think.
Thanks for the feedback Mr.Sajnog. Went to the range the other day and I took your advice. Looks like my grip wasnt strong enough. After strengthening my grip, my controllability and speed of my follow up shots dramatically improved. Thanks again!
What you mean I have to learn how to shoot old school before I can fit all my gadgets? :op
Good advice though, I don’t see it being adhered to on the range much though lol.
Amazing watch man! Great article. I’m a carry instructor in MN and I always appreciate well articulated instruction to help me refine my own.
While I have no reason to question your advice to position the support hand as far out as possible when shooting a long gun, your comment regarding nails and a 2×4 is not a similar example; there’s no torque applied in that instance (hinge). Supporting the gun on a rest that’s NOT pivoting (at one’s shoulder) would be a perfect match for your 2×4 example. A more appropriate (but still not perfect) example to hand-held shooting is carrying a heavy load; do you carry it far from your body, or close in? Of course, with a long gun, the load is where it is, regardless of where the arm supports it. The support arm shoulder must apply the same amount of torque to the gun, regardless of hand distance; your point about directing as many points on your body towards to the target makes a lot of sense. I look forward to applying your advice during my next trip to the back 40!
I have a p226 through which I’ve put probably fewer than 1,000 rounds so
far, so I’m kinda just starting with this pistol. I am right-hand /
right-eye and am working on my grip, and I find that if I have the thumb
of my left hand directly opposite my trigger finger, my thumb ends up
landing on the take down lever. Is that ok? If I’m a spaz, could I end
up launching my slide or damaging the pistol? I’ve also tried my left
index finger wrapped around the front of the trigger guard, and that
feels pretty good, but is that a bad habit? I read where you joked
about ‘buck shot’ and thought, “yeah, that’s me”. I am shooting a six
inch group at eleven yards, which I guess are all center mass if I’m
ever attacked by a stationary round paper plate, but I want to be
better.
BTW I found your site just today and want to say that I enjoy it and appreciate it. Thank you.
Tim,
There is no problem with where your thumb is landing. Your slide won’t come off unless you want it to. That lever needs to turn 90-degrees to unlock.
As for your left finger. If it feels good and you’re hitting, it doesn’t matter where your finger goes. That goes for all the positions I teach. If something you’re doing works, don’t change it!
If you want to get better – dry fire is the key to success. Put in the time with a positive attitude and you’ll do well.
Hooyah!
Chris